🔥Better Photos Fast

Get your FREE Lightroom Color Editing Course & Learn How to:

✅ Create Color Harmony

✅ Improve Tonal Range

✅ Establish Color Separation

✅ Make Colors Tastefully Pop!

    I’ll never share your email address with anyone. Unsubscribe at anytime. Email Policy

    What New Camera Should I Purchase?

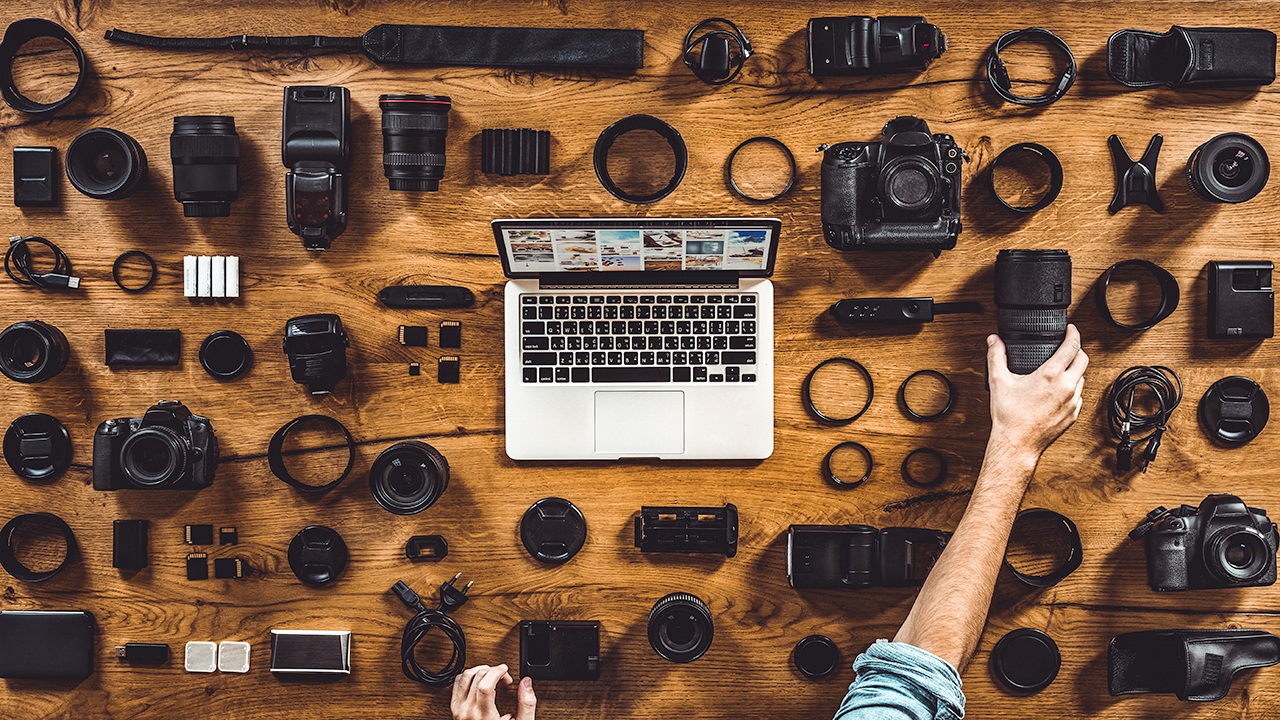
    Full Frame, Crop Sensor, DSLR, Mirrorless, Canon, Sony, Nikon - there has never been a time where so many camera options were available to consumers. Not only are there an abundance of brands, features and options to choose from, but the blistering pace at which camera manufacturers are refreshing their camera line-ups just adds to the dizzying decisions photographers are faced with when the time comes to decide whether or not to purchase a new camera.  

    What New Camera Should I Purchase? 01

    It’s rather easy to get caught up in the glitz and glamour of a recently refreshed version of our favorite camera setup, but in many cases a solid reason to upgrade might be absent outside of just wanting the “latest and greatest” version. I know I’ve personally fallen into this trap more times than I care to admit, but I’ve learned that before I rush out and make an impulsive decision I need to take my time and do my research in order to evaluate what the case for making a camera change truly is. 

    Identify The Problem You’re Trying to Solve

    First, identify what you’re looking to accomplish with a particular upgrade, or stated differently, determine what problem you’re trying to solve. Are you looking for a higher resolution camera because you want to begin printing your images larger or are you looking for a camera that has in body image stabilization  because you want the ability to take more handheld shots in low light conditions?

    What New Camera Should I Purchase? 02

    Or maybe you’re looking for a camera body that has dual SD card slots because you’ve had a card fail and lost all your images from a recent trip. Whatever the reason is, outlining the end goal and the problem you’re trying to solve is a great way to determine if now is the time to purchase a new camera. Read More>

    Mark

    Check out my Photo & Video Gear Kit!

    📨 Join 52k Readers

    The Morning Blaze - my free, email newsletter where I share photography education, tutorials, & inspiration I’ve gained throughout my journey from beginner to professional landscape photographer.

      I respect your privacy. Unsubscribe at any time.

      Find Your Creative Style With Split Toning

      In my opinion, the most under appreciated tool within all of Lightroom has got to be Split Toning. Not only is this a great option to solve many photo related problems, but it’s also an excellent way to work towards developing your own creative editing style. If you’re not familiar with Split Toning, it’s a fairly straightforward concept where you apply a specific tone to the shadow and highlight areas in order to create color separation within the luminance values of your image. Below is a great example of how Split Toning works - this is a standard gradient map going from pure black to pure white showing the shadow region transitioning to highlights.

      Find Your Creative Style With Split Toning Lightroom Tutorial 01

      If we go to the Split Toning module in Lightroom and apply a yellow tone to the highlights and a blue tone to the shadows, we’re left with a gradient map that looks like this: 

      Find Your Creative Style With Split Toning Lightroom Tutorial 02

      In this 11 minute video, I discuss the different techniques that can be used to apply Split Toning to your images and review the specific problems that it can solve. In this example, I want to add a subtle warm tone to the highlight areas to more closely resemble what the scene looked like when I originally photographed it.  

      Find Your Creative Style With Split Toning Lightroom Tutorial 03

      There’s a few ways to select the tones to apply, but a quick trick is to move the ‘Hue’ slider while pressing the ‘Option’ key (ALT on PC) - this will set the saturation of any specific hue to 100% in order to make it easier to decide which hue you’d like to choose. Once you identify the color you want to apply, just release the option key and move the saturation slider to the desired strength. 

      Find Your Creative Style with Split Toning Lightroom Tutorial 04

      Another option is to select the rectangular box to the right of the highlight and shadow area and use the eye dropper tool to select the exact color you want to apply.  

      Embracing the subtle Power of Split Toning 05

      Once you have your tones selected, Lightroom gives you the option to balance the amount of emphasis you’d like to apply to highlights vs shadows. If you want to put a greater emphasis on highlights then move the slider to the right, if you want to emphasize shadows move the slider to the left - or you can just leave it at 0 applying an equal weight to both.

      Embracing the subtle Power of Split Toning 06

      Below is what were left with after the split tone adjustment is applied. We were able to warm up the highlights and cool down the shadows using the cinematic color combination of teal and orange. This is a great example of fixing a problem and at the same time getting a bit creative with the edit. 

      Embracing the subtle Power of Split Toning 07

      When you land on a highlight / shadow combo that you really like, you can simply save the split tone adjustment as a preset and then apply it to any image you’d like moving forward. This is a great time saver and an excellent way to create consistency within your editing workflow that’ll enable you to work towards developing your own creative style. 

      Mark

      Check out my Photo & Video Gear Kit!

      📨 Join 52k Readers

      The Morning Blaze - my free, email newsletter where I share photography education, tutorials, & inspiration I’ve gained throughout my journey from beginner to professional landscape photographer.

        I respect your privacy. Unsubscribe at any time.

        3 Essential Reasons To Use Lightroom Range Masks

        Screen Shot 2018-11-17 at 8.14.11 PM.png

        With every Lightroom update, the overall power of the application increases. This could not be more evident than with the release of their newest tool, Range Masks. The need to create masks in order to create highly refined selections has always been one of the main reasons I had to move an image from Lightroom over to Photoshop to finish an edit. Also, the need to create highly-selective masks targeting very specific components of an image has almost become a standard practice with every image that I edit. When you make global adjustments, you might be effectively correcting one area of your scene, but at the same time you could be negatively impacting another.

        This is where having the ability to create a highly-targeted selection to a specific area of your photo is critical. The ability to do all of this under the proverbial hood that is Lightroom is huge! In my opinion, the less I have to bounce an image from one editing software to another the better. So, the more I can accomplish in Lightroom the better.

        Focused Local Adjustments

        As we mentioned earlier, making global adjustments to an entire image is fine in some situations, but you often need to make refined local adjustments. For instance, you may want to increase the shadows in one specific area of your foreground, but keep the shadow levels unchanged across the remainder of your image. This is where the Lightroom Range Masks tool comes in super handy. With the luminance or color range mask, depending on the scene, you can make a highly-refined selection only targeting the foreground of your scene while leaving the remainder of your image untouched.

        Range Masks are a great way to bring out the details and colors in every part of your landscape image while also selectively balancing light and exposure to create natural looking photos. Read More>

        Mark

        Check out my Photo & Video Gear Kit!

        📨 Join 52k Readers

        The Morning Blaze - my free, email newsletter where I share photography education, tutorials, & inspiration I’ve gained throughout my journey from beginner to professional landscape photographer.

          I respect your privacy. Unsubscribe at any time.

          6 Lightroom Tips to Create Moody Landscape Photos

          It seems the moody edit trend has been going strong for quite a few years now and it doesn’t appear to be slowing down. There’s probably no better time of the year to capture moody landscape photos than the winter months. It’s interesting, if you search the web for ‘moody landscape photos’ you’ll instantly see a trend of cool, blue & green toned, subdued images - these characteristics appear to be the most common qualities of a good moody image.  

          6 Lightroom Tips to Create Moody Landscape Photos 01

          In this 10 minute video I review six Lightroom editing tips that I apply to my images to create or enhance the mood of a photo. 

          1. Reduce Exposure & Cool Down

          First we want to reduce the exposure a bit and cool down the overall color temperature of the image. This step is an easy and straightforward one, but makes a dramatic impact to the feeling of the photo.


          2. Tint the Shadows

          This is something I don’t hear done very often, but tinting the shadows in the ‘Calibration” section and sliding the tint more towards the green side creates an impressive result that helps achieve that “cinematic” look.  

          6 Lightroom Tips to Create Moody Landscape Photos 02

          3. Desaturate the Color Palette 

          There’s a few different approaches you can apply here to effectively desaturate an image. I generally like to increase vibrancy while at the same time reducing the saturation or I’ll jump into the HSL panel and individually change the saturation and luminance of each color channel. 

          4. Adjust Tone Curve

          Subtle-Subtle-Subtle! You can get sideways real quick here if you’re not careful. Adjusting the Tone Curve of the blue channel can create an incredibly moody effect when done in an oh so delicate way.  

          6 Lightroom Tips to Create Moody Landscape Photos 03

          5. Split the Tone

          I find that Split Toning is great for creating color contrast or color separation between the highlights and shadow areas of an image. Since we already applied a cool green tint to the shadows in Step 2, I want to apply a bit of warmth to the highlights to better seperate the two regions of the photo. 

          6 Lightroom Tips to Create Moody Landscape Photos 04

          6. Vignette & Texture

          And for the finishing touch, I always like to apply a vignette to the image just to darken down the corners a bit to keep the viewers ey e looking towards the center of the photo. And, apply a touch of grain just to rough the photo up a bit and get away from the perfectly clean digital image appearance.

          I’m sure there’s a slew of additional ways to a apply a moody edit to an image, but these are the six steps I generally follow when creating this look. I’m always amazed how simply adjusting the the colors and color balance of an image can completely change the feeling of a photograph and it’s fun to do as well! 

          Mark

          Check out my Photo & Video Gear Kit!

          📨 Join 52k Readers

          The Morning Blaze - my free, email newsletter where I share photography education, tutorials, & inspiration I’ve gained throughout my journey from beginner to professional landscape photographer.

            I respect your privacy. Unsubscribe at any time.

            7 Essential Lightroom Tricks I Use Daily

            Everyone’s list of Lightroom tricks and shortcuts is a bit different and when I started to compile mine I wasn’t 100% sure what they were exactly. It’s funny how you don’t even realize you’re using these handy timesavers as they become second nature when you apply them within your editing workflow. 

            In this 6-minute video, I review my list of 7 essential Lightroom tricks that I use on a daily basis. These are placed in order of importance simply based off of how often I use them. Some of these are widely known and others I don’t hear discussed very often - hopefully you aren’t familiar with all of them and you’re able to pick up a couple new ones that you can apply to your editing process moving forward. 

            7.  Spot Removal Reselect 

            How often does Lightroom auto select an inaccurate area of your image to use as the basis for the spot removal tool? Happens to me all the time and if it happens to you, just hit the forward slash key “/“. This will tell Lightroom to make another selection - you can keep doing this until you’re happy with the selection. 

            7 Essential Lightroom Tricks I Use Daily 01

            6. Increase Your Feather

            Simply holding down the shift key while simultaneously hitting either of the bracket keys, this will increase or decrease the size of the feather of your local adjustments brush. A super simple trick, but insanely useful!

            5. Survey Mode

            This is a great for landscape photography where you have many images that look seemingly identical. While in the library module, if you highlight say 9 images and select the “N” key this will bring up the survey mode. This is a great way to figure out which one if the keeper! 

            7 Essential Lightroom Tricks I Use Daily 02

            4. Shift Double Click Slider 

            Not sure what the name of this trick is so I just made one up. While in the develop module, if you hold down the shift key and double click the sliders within the basic panel, Lightroom will automatically set that particular slider to what the “auto” setting should be. This is a great way to get an idea on one certain slider as opposed to hitting the actual auto button which will set all sliders to the “auto” setting. 

            3. Show Selected Mask Overlay

            Not sure why Lightroom decided to make the “Show Selected Mask Overlay” checkbook so small, but if it drives you bananas trying to click this every time you want to see the mask you’ve applied, just hit the shortcut key “O”. 

            7 Essential Lightroom Tricks I Use Daily 03

            2. Instagram Crop Shortcut

            If you have an image in a landscape orientation and you want to crop it to the 4x5 aspect ratio for Instagram you’ll notice that 4x5 for landscape orientation is different than 4x5 for portrait orientation which is what Instagram prefers. I quick way to make this adjustment is to use the shortcut key “X”. 

            7 Essential Lightroom Tricks I Use Daily 04

            1. Before & After Key

            This is a fairly popular trick and it’s one that I use many times throughout my day. While in the develop module on a particular image you can select the backslash key “\” to show you what your image looked before any edits were applied. 

            Like I said earlier, I hope you weren’t familiar with all of these tricks and shortcuts and you were able to walk away with at least a few new ones that you can apply to your post processing workflow moving forward.

            Mark

            Check out my Photo & Video Gear Kit!

            📨 Join 52k Readers

            The Morning Blaze - my free, email newsletter where I share photography education, tutorials, & inspiration I’ve gained throughout my journey from beginner to professional landscape photographer.

              I respect your privacy. Unsubscribe at any time.

              3 Tips for Choosing Black & White or Color

              Something I’ve always found difficult was knowing when an image should be converted to black & white and when it should be left in color.  It’s one of the more contested discussions in photography and there really isn’t a “black and white”:) or cut and dry answer to it. After much trial and error, I’ve come up with three questions that I consistently ask myself when trying to determine if a color image is a good candidate for black & white.

              Does the image NEED color?

              Some images need color in order to be effective and to accurately represent a moment in time. Color is fantastic at catching the viewers attention and depicting seasonality or setting from a time of day perspective. In the example below, if you remove the color from the scene, the entire story changes and you can no longer lean on the autumnal colors as the main subject of the photo. On the other hand, images that have a subdued color palette and don’t rely on color to portray the story could be good candidates for a black & white treatment.  

              3 Tips for Choosing Black & White or Color Image 01
              3 Tips for Choosing Black & White or Color Image 02

              Is there interesting light or shadows?

              Black & White is great at showing off the tonal range in the light and shadow areas of your scene. Many times in situations similar to the image below, color can actually become a distracting element that takes the viewers attention away from the interesting light and/or shadows.  

              3 Tips for Choosing Black & White or Color Image 03
              3 Tips for Choosing Black & White or Color Image 04

              Are there any interesting textures?

              Now this is my favorite question! If you have an image that has interesting texture then it could most definitely be a great candidate for B&W. Images that are captured when the sun is low on the horizon, providing side light that rakes across your subject creating incredible textures - well this is where B&W shines the most in my opinion. When people think of B&W they think of a raw and gritty image that has a certain level of toughness associated with it and this is emphasized even more when B&W is applied to an image with interesting textures.   

              3 Tips for Choosing Black & White or Color Image 05
              3 Tips for Choosing Black & White or Color Image 06

              Although this isn’t an exact science and these questions are by no means the end all be all solution to identifying good Black & White photos, they will certainly jump start the creative thinking to help you identify what works best for a particular image, Black & White or Color.  

              Mark

              Check out my Photo & Video Gear Kit!

              📨 Join 52k Readers

              The Morning Blaze - my free, email newsletter where I share photography education, tutorials, & inspiration I’ve gained throughout my journey from beginner to professional landscape photographer.

                I respect your privacy. Unsubscribe at any time.

                4 Simple Tips for Better Landscape Photography Trips

                Due to circumstances that are generally out of our control, not all landscape photography trips are a success, but with a bit of planning you can increase the likelihood of having a productive outdoor photography shoot. The soft morning or late afternoon light that all landscape photographers are after is generally a short lived event and being as prepared as possible will enable you to capture it when the moment is right. 

                Virtual Scouting

                A great way to determine if a location is photogenic is to hop over to 500px and run a search for your location. This will also show you how others are capturing your planned location and will provide compositional ideas that you might want to apply or avoid when you’re on-location.  

                4 Simple Tips for Better Landscape Photography Trips 01

                Pre-Visualization

                It’s good to not only become familiar with your specific subject you’ll be photographing, but also the surrounding area. For this, Google Earth is your best friend - this is one of the coolest applications Google has ever created in my opinion. 

                4 Simple Tips for Better Landscape Photography Trips 02

                Light

                This is what we’re all after! Good light can make or break a photo and understanding where and when you can expect the light to arrive is super powerful information to understand. There’s many apps you can use to determine this, but the app I like to use is LightTrac. It’s very straightforward and has a user friendly interface that will show you everything you need to know in order to be in the right place at the right time. 

                4 Simple Tips for Better Landscape Photography Trips 03

                Clouds

                This works in conjunction with the light, if the clouds are thick any available light will be snuffed out. The clouds that produce those burning sunrises or sunsets we all love are high clouds. I use an app called Clear Outside to determine the predicted cloud cover for a specific location on a certain day and time.  

                4 Simple Tips for Better Landscape Photography Trips 04

                There’s nothing worse than running around on location like a lunatic trying to find a good composition when the sky is exploding with color, but with a bit of advanced planning you can reduce the chances that this will happen to you on your next photography adventure.

                Mark

                Check out my Photo & Video Gear Kit!

                📨 Join 52k Readers

                The Morning Blaze - my free, email newsletter where I share photography education, tutorials, & inspiration I’ve gained throughout my journey from beginner to professional landscape photographer.

                  I respect your privacy. Unsubscribe at any time.

                  How to FIX WIDE ANGLE SHRINKAGE Fast in Photoshop!

                  How many of you can relate to this scenario? You encounter a scene that really grabs your attention, it has all the elements you look for in a great composition - spectacular foreground that works the eye towards the mid-ground which in turn leads the viewer towards a majestic mountain range in the background. You grab your wide angle lens to capture the entire scene, click the shutter, review the image - you couldn’t be happier with the results. You arrive back home, load the image on your computer, but somethings off, the image lacks the grandiose quality that first caught your attention. The foreground and mid-ground look solid, but the the mountain range in the background no longer reflects what you saw with your naked eye - it shrunk! This shrinking effect is a common issue with wide angle photography where your background elements take on a miniaturized look - especially mountains. In this video, I’ll show you a cool trick to quickly stretch those shrunken mountains to more closely resemble what they appeared like when you first captured the image. The process is very straightforward and only consists of three simple steps. 

                  Step 1:

                  Load your image in Photoshop and grab your crop tool, you’re going to perform a “reverse crop” - instead of cropping in, you’re going to crop out, in order to create additional room to stretch your photo. 

                  How to FIX WIDE ANGLE SHRINKAGE Fast in Photoshop! 01

                  Step 2: 

                  Now, select your rectangular marquee tool and make a selection along your horizon line across your image and to the top of the photo. Next, you’ll want to right click your selection and click free transform.

                  How to FIX WIDE ANGLE SHRINKAGE Fast in Photoshop! 02

                  Step 3:

                  For the final step, you simply grab one of the anchor points at the top of your selection and drag your image to where your crop ends and select the check mark to confirm the transformation.  

                  How to FIX WIDE ANGLE SHRINKAGE Fast in Photoshop! 03

                  And that’s it, you’ve successfully recreated the scene as you saw it in the moment. Wide angle lenses are a necessity in landscape photography, but they don’t come without their distortion issues, however with a bit of finesse and Photoshop wizardry these issues can easily be resolved. 

                  Mark

                  Check out my Photo & Video Gear Kit!

                  WideAngleGIF.gif

                  📨 Join 52k Readers

                  The Morning Blaze - my free, email newsletter where I share photography education, tutorials, & inspiration I’ve gained throughout my journey from beginner to professional landscape photographer.

                    I respect your privacy. Unsubscribe at any time.

                    3 QUESTIONS To Ask Before SWITCHING CAMERA BRANDS!

                    It’s been an active few weeks in the world of new camera announcements. Between Nikon, Canon and Fuji, there’s a slew of state-of-the-art camera choices available to entice photographers to switch brands. As I dug into the details associated with such an important decision, I set out to determine the most responsible way of identifying if making a brand change made sense for me. 

                    LandscapePhotographyGear

                    1) What’s The Out of Pocket Expense?

                    Sounds like common sense, but going through the process of identifying how much I could sell my current camera and lenses helped me to quantify a financial starting point. In order to do this, I went to B&H’s website and entered my equipment to determine how much I could expect to receive if I decided to sell my kit to them. This enabled me to figure out what additional out of pocket expense would be required in order to make a switch to one of the three recent camera announcements. 

                    2) What’s The Increase in Quality Worth?

                    The main reason to switch camera brands is usually to increase photo and video quality, but does the perceived increase in quality justify the additional expense? Regardless if your out of pocket costs are $1,500, $2,500 or $3,500, does this additional cost substantiate your expected increase in quality? In the above video, I decided to test myself - I downloaded an image from each of the three recently released cameras to determine which image I liked best and to see if I could tell which brand produced which photo - I was rather surprised by the results!  

                    LandscapePhotographyBlog01
                    LandscapePhotographyBlog02
                    LandscapePhotographyBlog03

                    3) What’s Your Problem?

                    Ask yourself this, “What problem am I having with my current camera that the new one will solve?”. This is a powerful question and will help you determine if you’re wanting to switch brands just for the sake of switching or if there’s a real case for change. It’s common to want to shift over to a new brand just because you’re bored with your current setup, but this can be an expensive transition if you’re not solving a current problem, outside of just wanting to change things up a bit. 

                    Whatever the case may be, if you can identify problems that can be solved by switching camera brands and the additional out of pocket expense doesn’t outweigh the expected increase in quality, then it might be time to think about switching brands. Photographers spend a small fortune on camera equipment and making the choice to switch to an entirely new brand might be the single most impactful gear related decision we will ever make. 

                    Mark

                    Check out my Photo & Video Gear Kit!

                    📨 Join 52k Readers

                    The Morning Blaze - my free, email newsletter where I share photography education, tutorials, & inspiration I’ve gained throughout my journey from beginner to professional landscape photographer.

                      I respect your privacy. Unsubscribe at any time.

                      3 Reasons You Don’t Need To Be A Pro To Make Great Photos

                      The label of being a “professional” at something whether you’re a professional football player or a professional figure skater typically means you’re the best of the best in your respective field, but when it comes to a professional photographer the same assumption can’t be made. I hear from people on a regular basis that discount their personal photographic abilities because they say they aren’t a “pro”, rather just an amateur or a hobbyist. This thought track is what initially got me thinking about what really constitutes a professional photographer. 

                      What does “Pro” really mean?

                      Depending on who you ask, a photographer becomes eligible for the “pro” stamp of approval  if 100% of their income is generated from some sort of photographic activity, but all this means is that they’ve wrapped a business around their love of photography. It has absolutely no merit  on their particular skill set, portfolio, or quality of work - it has more to do with their business

                      3 Reasons You Don’t Need To Be A Pro To Make Great Photos 01.jpg

                      acumen and their ability to market themselves. I’ve seen plenty of amateur photographers that are more skilled than some of the “pro” photographers out there, but they have a 9-5 job outside of photography, therefore cannot receive the professional label under today’s requirements. 

                      Gear Doesn’t Matter

                      We’re all conditioned to believe that gear matters, but it’s simply not quite as important as we’re influenced to think. Professionals will typically have better gear than most amateurs, mainly because they can easily justify upgrading on a consistent basis as they generate income from their equipment.

                      3 Reasons You Don’t Need To Be A Pro To Make Great Photos 02

                      An important factor to consider here is  the law of diminishing return, the difference between a $100 camera and a $1,000 camera is HUGE! The difference between a $1,000 and a $2,000 camera is significant - not as significant though as the variance between the $100 versus $1,000 camera and the same goes for a $2,000 camera in comparison to a $4,000 camera. There is a difference, but the perceived increase in quality begins to become difficult to easily identify. 

                      Passion Driven Shooting

                      This is where amateurs and hobbyist have a distinct advantage over the pros. If you’re an amateur photographer you typically only photograph things you’re passionate about, things that inspire you and put a smile on your face. Professional photographers do the same, but also end up photographing things they aren’t necessarily passionate about as they must also focus on generating income to pay their mortgage or send their kids to college. This is one of the things I initially noticed when I made the leap from an amateur to a “professional” photographer - shooting what you love is much more rewarding than shooting for a paycheck. 

                      Landscape Photography Waterfall

                      At the end of the day, if you like taking photographs and you enjoy photography, then you’re a photographer. Don’t get hung up on the labels amateur, hobbyist, or professional as these labels really  don’t mean a thing other than where you generate your income and definitely don’t let it stand between you and putting yourself out there because you don’t think you have the capacity to be a “pro”.

                      Mark

                      Check out my Photo & Video Gear Kit!

                      📨 Join 52k Readers

                      The Morning Blaze - my free, email newsletter where I share photography education, tutorials, & inspiration I’ve gained throughout my journey from beginner to professional landscape photographer.

                        I respect your privacy. Unsubscribe at any time.