
I think we can all agree there’s an abundance of information at our disposals with regards to improving ones landscape photography skills. But one thing I feel that’s consistently overlooked is in reference to the stage of the process that occurs after the photo edit is complete yet before the actual export routine begins. There’s so many steps involved throughout the photo editing process that build on one another that it’s easy to accidentally get tripped up. In this article I want to share with you the five things that consistently get by me at the end of my photo editing process and the steps I implemented to solve these oversights if you will - I suppose you could call this the post, post processing process.
1) Exposure
One of the first steps in my editing process consists of correcting exposure, but the problem with this is that there’s many adjustments I apply afterwards that impact the exposure of the image. For instance, when you adjust your shadows & highlights, contrast, or your white & black point, these are all things that also impact your exposure. This intern would always result in my exposure at the end of my edit being vastly different from what I set it at the beginning stages of my processing. The resolution for this is simple, once you finish your photo edit, change the background color surrounding your image to black and take a minute and ask yourself if the exposure still looks correct.

Then switch the background color to white and ask yourself again, does the exposure still look correct? This will provide you with a new frame of reference to determine if you still think your image is properly exposed. (right click on the background area surrounding your photo to change the color)

2) Shadows & Highlights
This issue is similar to the exposure problem where I would update my shadows & highlights in the beginning stages of my editing process. Then after additional adjustments such as contrast, exposure and correcting the white & black point, my shadow & highlight adjustments would no longer accurately reflects my initial calibration. But, fret not as Lightroom has an excellent way of determining if you have overexposed (clipped) highlights or underexposed (crushed) shadows. In other words highlights that are so bright they contain no detail and are pure white or shadows that are so dark they contain no detail and are pure black. The easiest way to access this feature is by pressing the shortcut key J. Anything that’s highlighted in red indicates overexposed highlights and anything highlighted in blue indicates under exposed shadows.

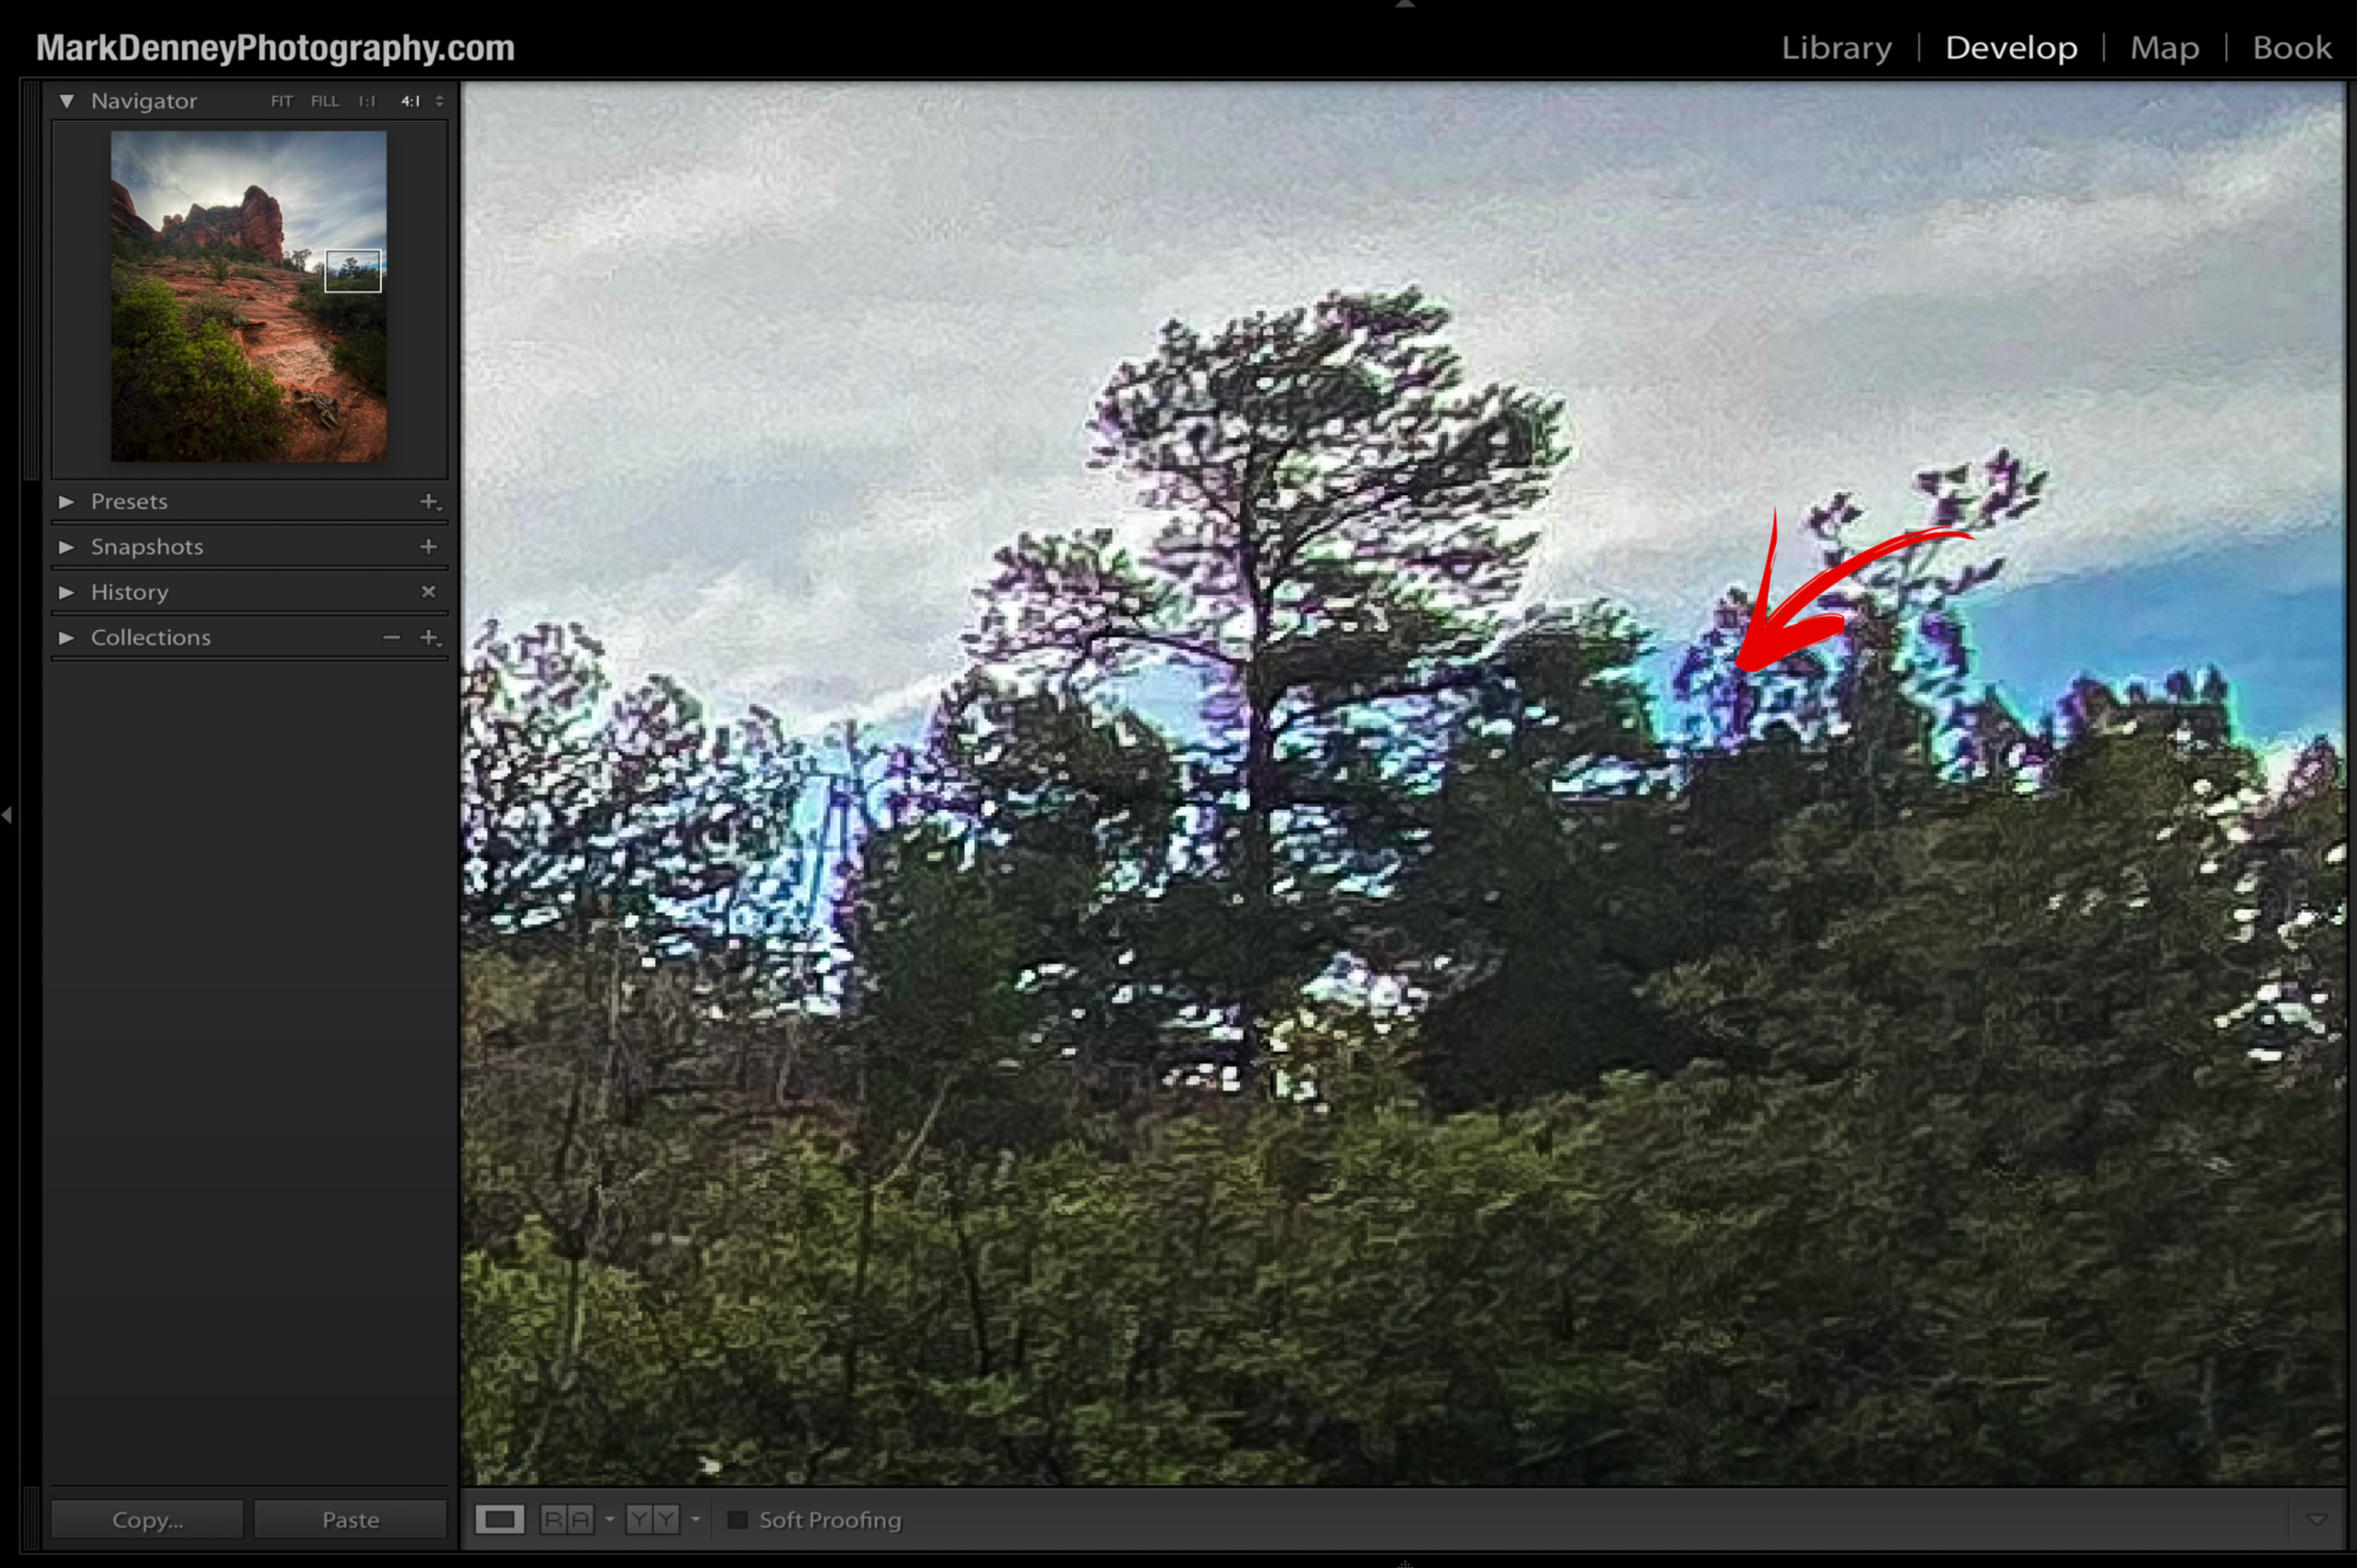
3) Dust Your Photos
Now this one used to get by me all the time and for some reason it would take me months and sometimes years to catch it and it’s dust septs resulting from either something on your camera’s sensor or your lens itself. Thankfully though, Lightroom has one of the best methods for not only identifying these seemingly invisible buggers, but also eliminating them. If you open the Spot Removal tool and check the box in the bottom left hand corner titled “Visualize Spots” this is how you can not only find them, but also remove them.

4) Remove The Fringe
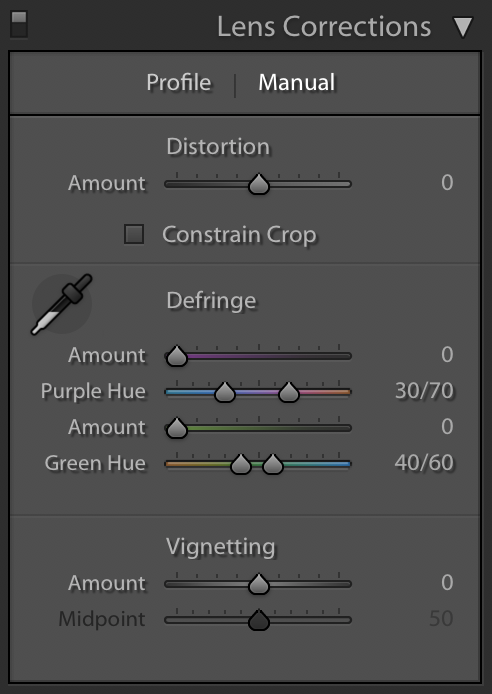
It took me a long time to figure this one out as I always thought Lightroom had it covered when I selected “Remove Chromatic Aberration” in the Lens Correction section. I did this as one of my initial steps throughout my editing workflow and just assumed Lightroom would take care of the rest - well I was certainly wrong!
Turns out if you “really” want to remove all the chromatic aberrations, which I’m sure everyone does, then you need to do it by selecting ‘Manual’. It’s a pretty straightforward process of grabbing the eye dropper and dropping it on an area where the chromatic aberration is the worst and Lightroom will make the correction. Once completed you can make any additional adjustments by using the ‘Amount’ and ‘Hue’ sliders below.

5) Flip It
The final “Quality Control” check is, and I know it sounds odd, but flip your image upside down. The beauty behind this is that it sort of takes the image out of the photo - what I mean is that you no longer see the photo as your photo, rather you now just see it as shapes. This is great for checking your composition or crop and also checking for distractions that may be creeping into the edges of your scene.

So that’s my sort of post - post processing process:) It’s basically a quick quality control check before hitting the export button and posting your photos on your website or various social media platforms only to later discover that they contain errors that you missed. I hope this article provided you with some useful information that you can apply to your post processing workflow moving forward.
-Mark