
Perhaps one of the most sought after qualities amongst outdoor and landscape photographers is overall image sharpness. Understanding how to properly sharpen your landscape photos during post processing has become a rather complex and highly detailed procedure over the years due to the advancements in editing software. The interesting thing about sharpening though, is that the entire process is merely an illusion as there isn’t any way to actually “sharpen” a photograph.

The wizardry known as sharpening in Lightroom (or any other software) is the result of selectively applying small amounts of contrast to the edges of your image. This modest amount of edge contrast is what creates the illusion that an image is actually sharper than it was straight out of camera. Sounds easy enough, but the tricky part is understanding the best way to sharpen multiple types of detail and textures within your image. Not all details are the same and they shouldn’t be enhanced as if they are.
Sharpening Workflow
When it comes to sharpening in Lightroom for nature photography, there is no one-size-fits-all approach. Within a single nature photo you can have various types of detail and textures that require enhancing. These include small to fine-sized detail, medium and large-sized detail, or maybe all three. Each level of detail should be enhanced or sharpened independently using specific tools and methods of application.
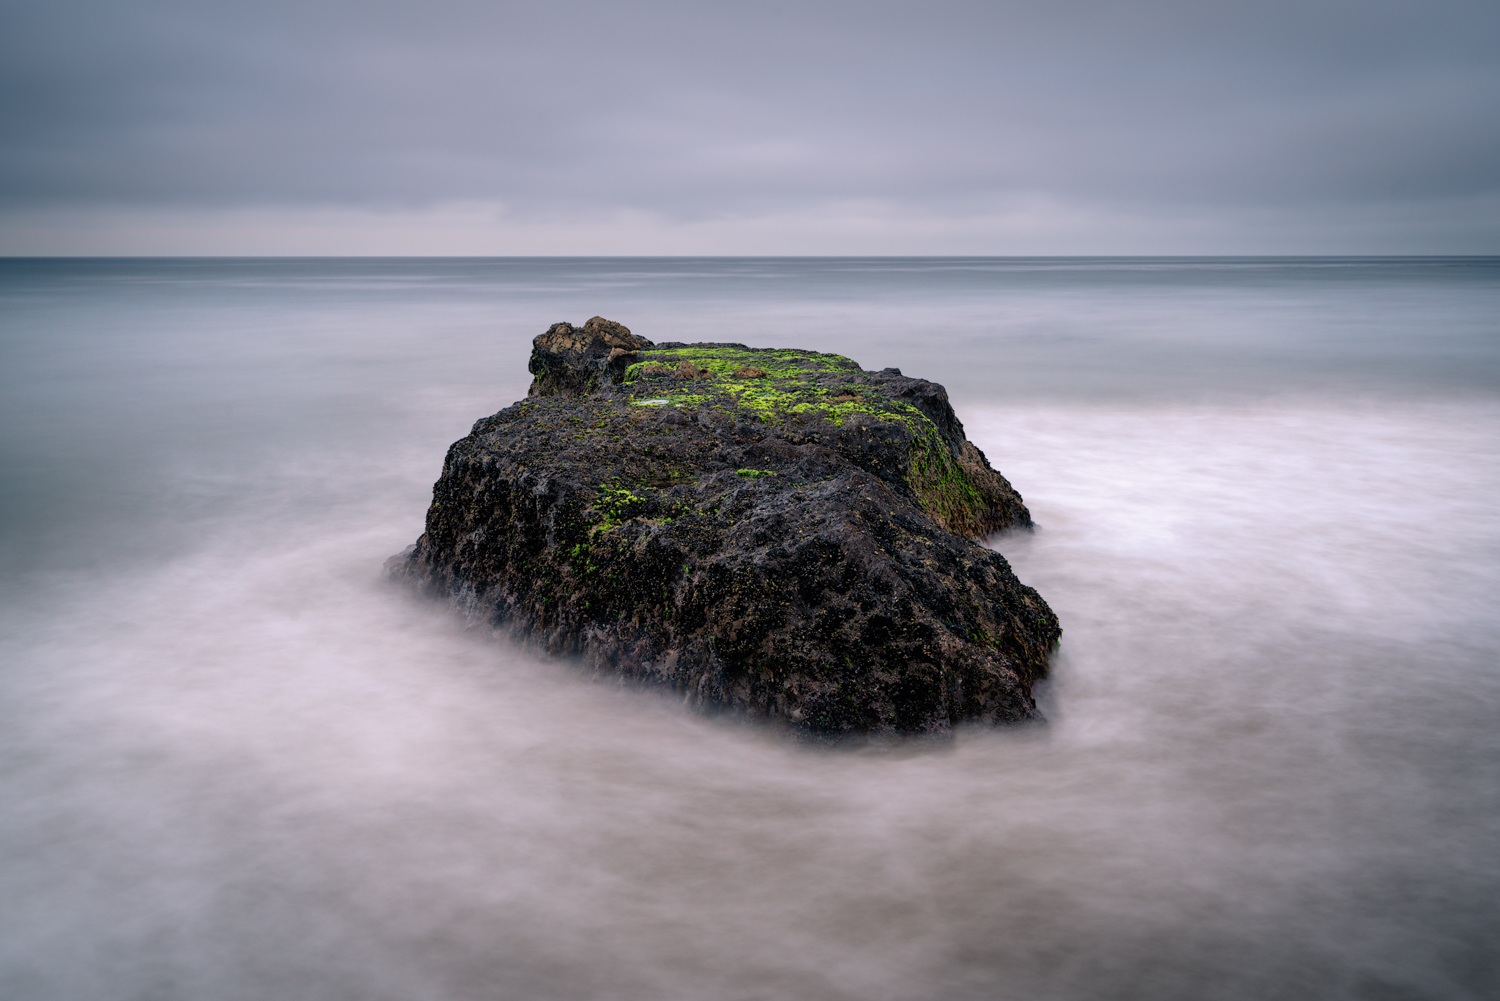
For example, in the image above, a strong edge sharpening is required only in the rock and not in the rest of the image. Similarly the ocean surrounding the rock along with the sky can benefit from enhancing texture.
There’s multiple tools available within Lightroom to enhance details and textures. Each method creates a similar yet different result depending on the level of detail you're looking to enhance. Below are a few of my favorite tools that I use to sharpen my landscape photos.
Detail Panel
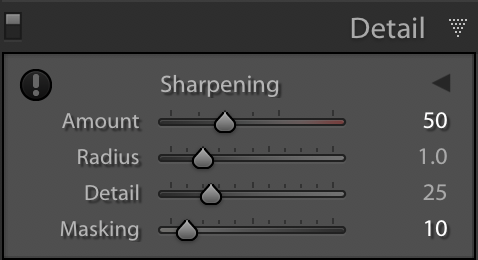
This tool is perhaps the most popular technique when it comes to sharpening in Lightroom. This approach is comprised of four sliders: Amount, Radius, Detail, and Masking. It is a fantastic option to sharpen the small to fine-sized details contained within your image.
Here is an example from my new Sharpening in Lightroom Tutorial that shows you just how effective the Details panel in Lightroom can be.
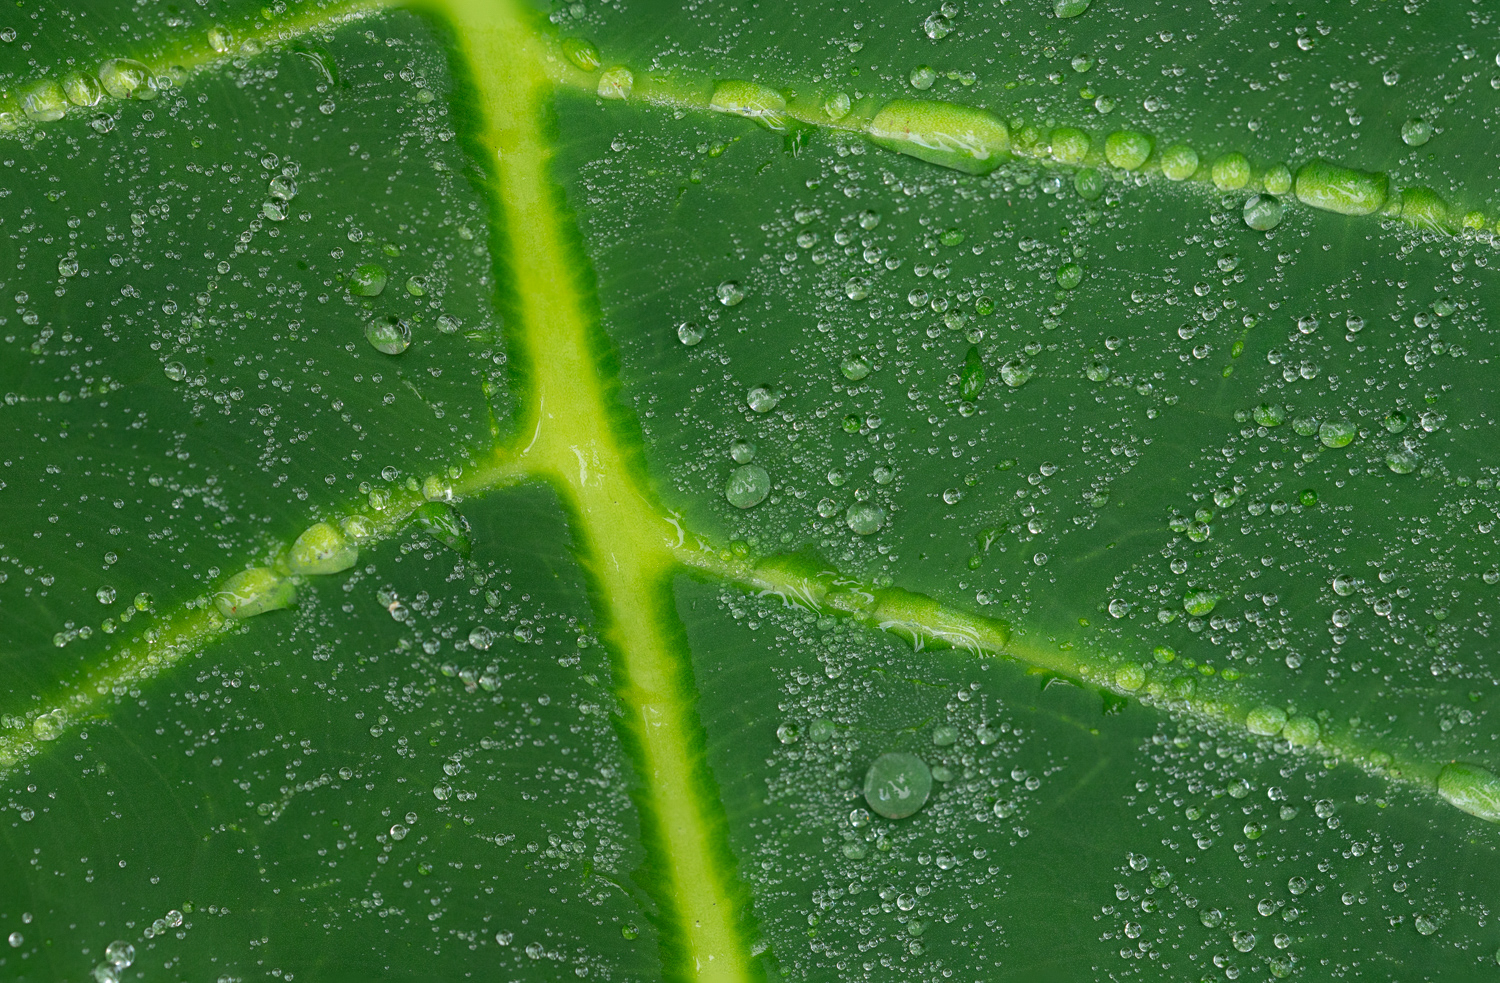
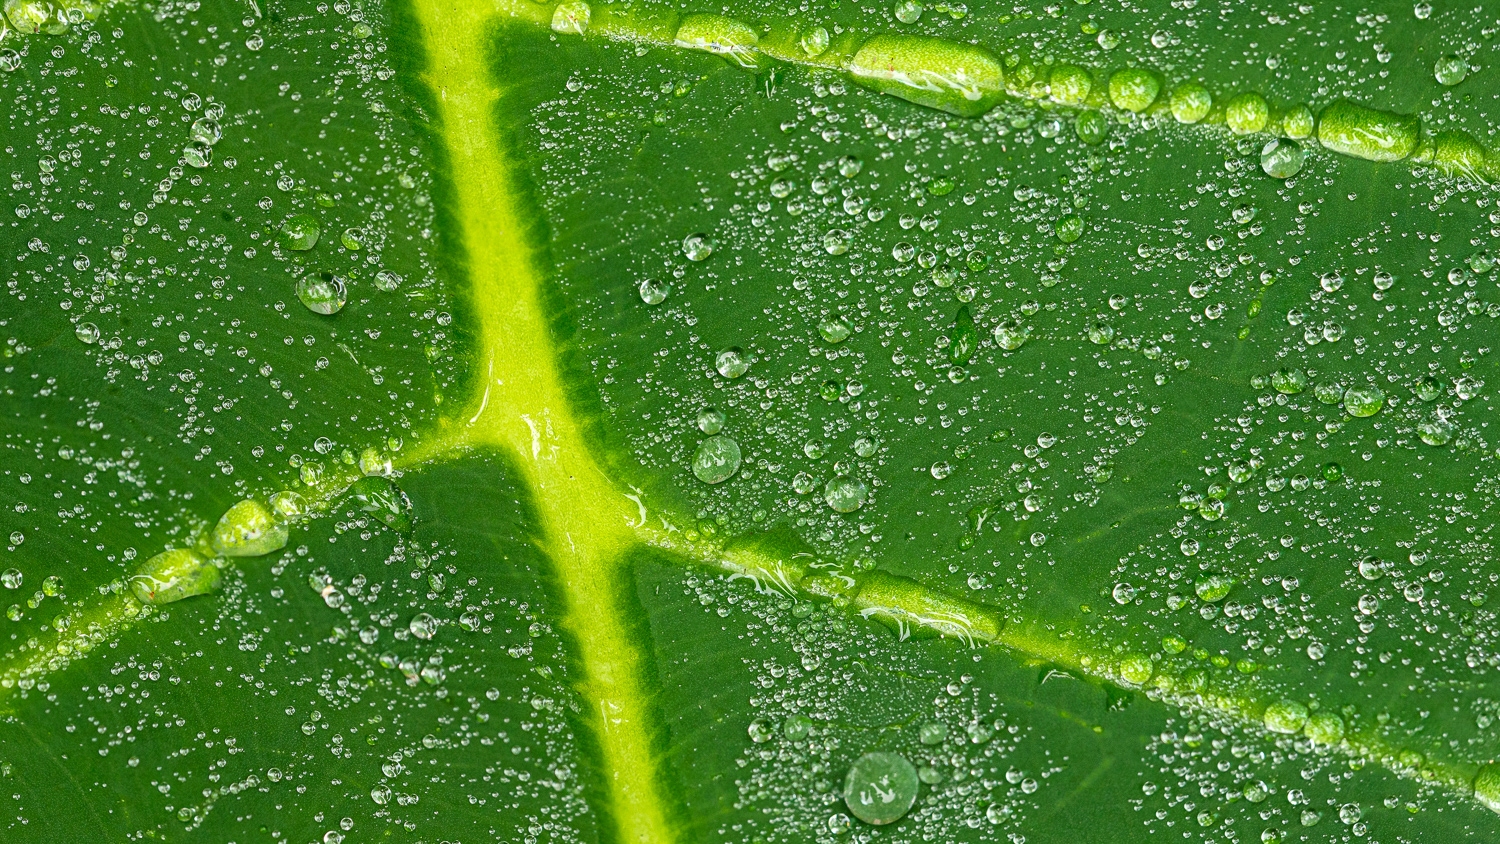
The first image above (Image #1) is an abstract nature photo before I applied sharpening. I sharpened Image #2 using the details panels and other tools in Lightroom.
Texture Slider
This slider is perfect for sharpening and enhancing small to medium-sized details. I’ve found the best way to see the impact of this tool is to zoom in quite a bit and scrub the slider from -100 to +100. This is an easy way to visualize the level of detail that’s being impacted. Read more>